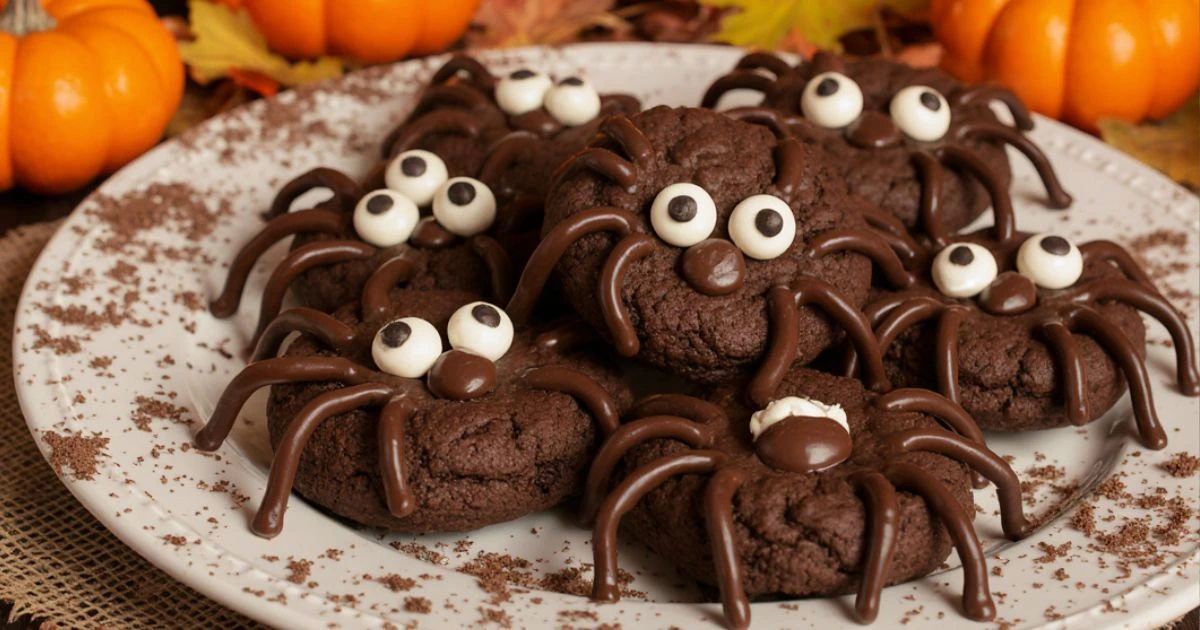
Sinisterly Sweet Spider Chocolate Cookies
Halloween is just around the corner, and what better way to celebrate than with sinisterly sweet spider chocolate cookies? These spooky treats are not only delicious but also fun to make and decorate. Whether you’re hosting a Halloween party or simply indulging in festive baking, these cookies are sure to impress.
What Are Spider Chocolate Cookies?
Spider chocolate cookies are a playful and eerie twist on your typical chocolate chip cookies. They’re decorated with spooky spider shapes, made from melted chocolate and other fun edible decorations. These cookies often have a rich, chocolatey flavor, making them an irresistible treat for Halloween lovers. The best part? They’re surprisingly simple to make, even for beginners.
Spider chocolate cookies are perfect for your Halloween festivities, and the spider web cookie design is sure to capture the attention of all your guests. These cookies are not just for Halloween—create them for themed parties, school events, or a fun family baking session. To get more inspiration for your Halloween treats, check out this Halloween dessert recipe collection.
Ingredients for Sinisterly Sweet Spider Chocolate Cookies
Creating sinisterly sweet spider chocolate cookies is an easy and fun process, but you’ll need the right ingredients to make them extra spooky and delicious. Here’s everything you’ll need for these hauntingly tasty cookies:
- 1 cup unsalted butter, softened
Softened butter ensures the dough comes together smoothly and gives the cookies that melt-in-your-mouth texture. - 1 cup granulated sugar
Adds the perfect sweetness to balance the rich chocolate flavor. - 2 cups all-purpose flour
The base of the dough. You can substitute this with a gluten-free flour blend if needed. - 1/2 cup unsweetened cocoa powder
Gives the cookies a deep, chocolatey taste that makes them irresistible. - 1/2 teaspoon baking soda
Helps the cookies rise slightly and become soft and chewy. - 1/4 teaspoon salt
A pinch of salt balances the sweetness and enhances the chocolate flavor. - 2 large eggs
Essential for binding the dough together and giving the cookies structure. - 1 teaspoon vanilla extract
Adds depth to the flavor and complements the chocolate perfectly. - 1 cup chocolate chips
For an extra burst of chocolate in every bite. - Melted dark chocolate (for decorating)
This is used for piping out spider legs and creating the creepy spider design. It adds a rich and slightly bitter contrast to the sweet cookies. - Candy eyes or chocolate chips
These are used to complete your spider decorations, giving them a spooky look.
If you’d like to make these cookies vegan, you can swap the butter for a plant-based alternative and use egg substitutes like flax eggs. For a fun twist, consider adding a handful of mini marshmallows or peanut butter chips to the dough for added flavor and texture.
These ingredients come together to create a spooky, sinisterly sweet treat that’s perfect for any Halloween gathering!
If you’re looking to make these cookies gluten-free, simply swap the flour with a gluten-free flour blend. You can also make these cookies vegan by using a plant-based butter substitute and egg replacement. For more on gluten-free baking, head to this guide on gluten-free flour substitutes.
Step-by-Step Instructions for Sinisterly Sweet Spider Chocolate Cookies
Making sinisterly sweet spider chocolate cookies is a fun and straightforward process. Follow these step-by-step instructions to create your deliciously spooky treats!
1. Preheat the Oven
Start by preheating your oven to 350°F (175°C). This ensures that your cookies bake evenly and perfectly once the dough is ready.
2. Prepare the Baking Sheets
Line two baking sheets with parchment paper or silicone baking mats. This prevents the cookies from sticking and ensures they bake evenly.
3. Mix the Dry Ingredients
In a medium-sized bowl, whisk together the following dry ingredients:
- 2 cups all-purpose flour
- 1/2 cup unsweetened cocoa powder
- 1/2 teaspoon baking soda
- 1/4 teaspoon salt
Mix until everything is well combined and set the bowl aside.
4. Cream the Butter and Sugar
In a large bowl, beat together 1 cup unsalted butter and 1 cup granulated sugar using an electric mixer or stand mixer. Beat on medium speed for about 2-3 minutes until the mixture is light, fluffy, and pale in color.
5. Add the Wet Ingredients
Add 2 large eggs one at a time, beating well after each addition. Then mix in 1 teaspoon vanilla extract until the mixture is smooth and combined.
6. Combine Wet and Dry Ingredients
Gradually add the dry ingredients to the wet mixture. Use a spatula or the mixer on low speed to blend everything together. Mix until the dough forms and there are no visible flour streaks.
7. Fold in the Chocolate Chips
Once the dough is ready, fold in 1 cup chocolate chips with a spatula. This adds extra chocolatey goodness to your cookies.
8. Shape the Dough
Use a tablespoon or a cookie scoop to portion out the dough. Roll each portion into a ball and place them on the prepared baking sheets, spacing them about 2 inches apart. Gently flatten each dough ball with the back of a spoon or your fingers to create a round cookie shape.
9. Bake the Cookies
Place the baking sheets in the preheated oven and bake for 8-10 minutes. Keep a close eye on them, as you want the edges to be firm, but the center should remain soft.
10. Cool the Cookies
Once baked, remove the cookies from the oven and let them cool on the baking sheet for 5 minutes. Then, transfer them to a wire rack to cool completely.
11. Decorate the Cookies
Once the cookies are completely cool, melt your dark chocolate in the microwave or over a double boiler. Use the melted chocolate to pipe spider legs onto parchment paper, forming long, thin lines. Allow the chocolate to cool and harden before attaching the spider legs to the cookies.
Finish by adding candy eyes or chocolate chips as the spider’s body, and voilà—your sinisterly sweet spider chocolate cookies are ready to haunt your Halloween festivities!
These cookies are sure to be a hit, both in flavor and spookiness, and will make your Halloween celebrations extra special.
For tips on making these cookies extra spooky, be sure to read this Halloween cookie decorating ideas guide for decorating tips.
Decorating the Spider Chocolate Cookies
The real fun begins when it’s time to decorate! Follow these steps for the spider decoration:
- Melt dark chocolate: In a microwave-safe bowl, melt your dark chocolate until it’s smooth and runny.
- Create spider legs: On a sheet of parchment paper, pipe the melted chocolate into long, thin lines to form spider legs. Let them cool and harden.
- Assemble the spider: Once the spider legs are cool, attach them to the center of each cookie, which will serve as the spider body. You can use a small piece of candy or a chocolate chip for the spider’s body.
For added effect, use candy eyes to give the spiders a creepy look! Check out this Halloween party ideas page for creative decoration inspiration.
Part 2
Storage and Shelf Life
These sinisterly sweet spider chocolate cookies can be stored for up to 5 days in an airtight container at room temperature. To keep them fresh for a longer period, store them in the fridge. You can also freeze them for up to a month if you’d like to save them for future Halloween events.
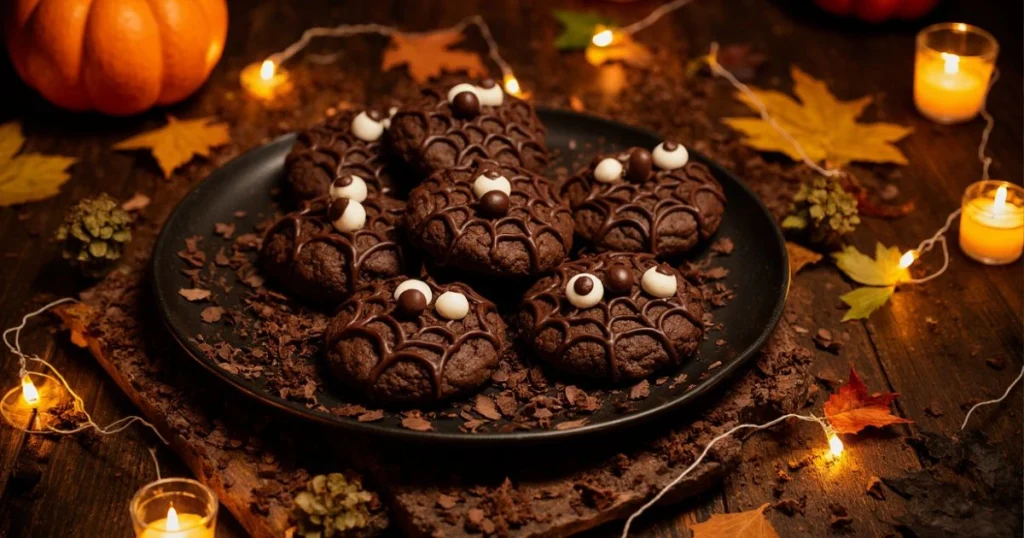
Why These Spider Chocolate Cookies Are Perfect for Halloween Parties
Spider chocolate cookies are the ultimate Halloween snack. Not only do they fit the spooky theme, but they’re also deliciously chocolatey and fun to make. Whether you’re having a themed party or a casual gathering, these cookies will delight both kids and adults. Their creepy-crawly look makes them a perfect conversation starter.
Pair them with other Halloween-themed desserts for a memorable spread. These cookies, along with creepy cake pops and spooky treats, will make your party a hit. If you’re looking for more Halloween-themed food ideas, check out this Halloween party snack guide.
Tips and Tricks for Perfect Spider Chocolate Cookies
To make sure your spider chocolate cookies turn out perfectly every time, follow these handy tips:
- Chill the dough: If your dough is too soft, refrigerate it for about 30 minutes before baking to help the cookies hold their shape.
- Use good quality chocolate: For the best spider legs, use high-quality dark chocolate to achieve the perfect texture.
- Don’t overbake: Overbaking will make the cookies dry, so keep an eye on them and remove them from the oven once the edges are set.
Variations of Sinisterly Sweet Spider Chocolate Cookies
While the original recipe is delicious, you can customize it to suit your dietary preferences:
- Gluten-free: Use a gluten-free flour blend.
- Vegan: Replace the butter with vegan butter and use flax eggs as a substitute for regular eggs.
- Peanut butter twist: Add 1/2 cup of peanut butter to the dough for a peanut butter chocolate spider cookie variation.
Conclusion
These sinisterly sweet spider chocolate cookies are the perfect treat for Halloween. Not only do they taste amazing, but they also look terrifyingly fun. Whether you’re a seasoned baker or a first-timer, these cookies are simple to make and offer endless decorating possibilities.
So, grab your ingredients, get baking, and let these spooky cookies take center stage at your next Halloween party!
FAQ
- What is the best way to decorate spider chocolate cookies?
The best way to decorate is by using melted chocolate for the spider legs and candy eyes for added details. - Can I make these cookies ahead of time?
Yes! These cookies can be made up to two days ahead and stored in an airtight container. - How do I make the spider legs on chocolate cookies?
Pipe melted chocolate into long thin lines to create spider legs and allow them to cool before attaching them to the cookie.
If you like more delicious dessert recipes.discover our new recipe for Red Velvet Cake