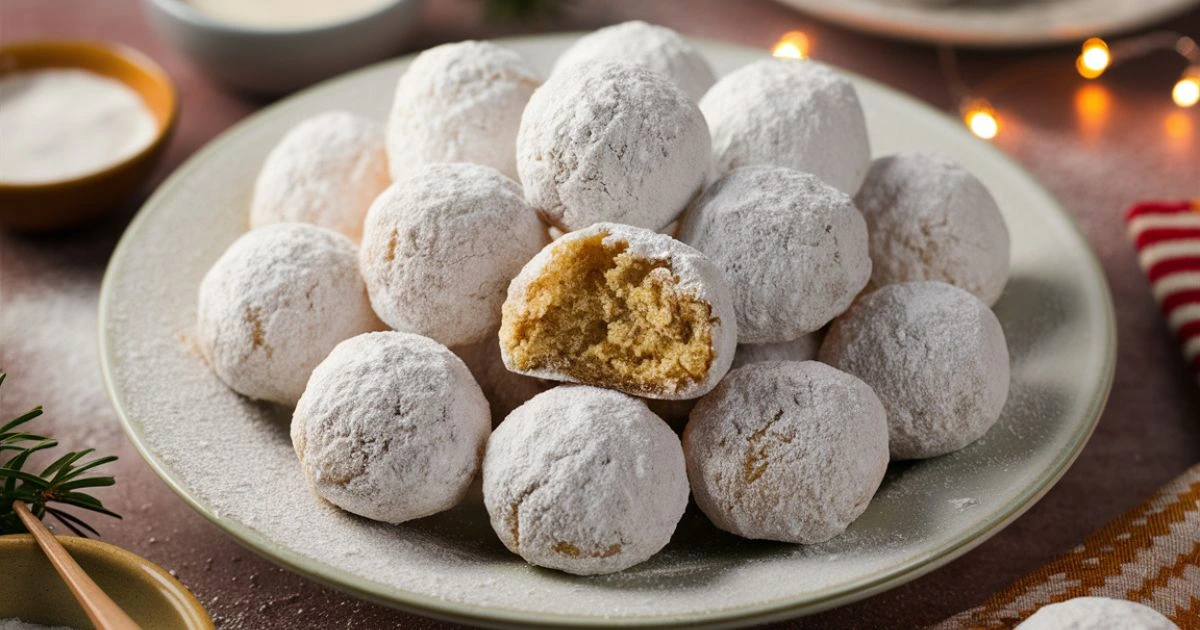
Sweetened Condensed Milk Snowballs: Easy, Delicious, and Irresistible!
Sweetened condensed milk snowballs are a holiday favorite and a perfect quick treat that requires minimal effort but delivers maximum flavor. Whether you’re a seasoned baker or a beginner, these melt-in-your-mouth cookies, often coated with powdered sugar or coconut, are an easy addition to your holiday cookie tray. They’re a perfect example of how just a few simple ingredients can create a delicious, nostalgic treat that everyone will love.
In this article, we’ll dive into everything you need to know about making sweetened condensed milk snowballs, including the recipe, tips for perfect texture, variations, and more. Whether you prefer them baked or no-bake, we’ve got you covered.
For a detailed recipe, visit Lord Byron’s Kitchen for a foolproof baked version.
What Are Sweetened Condensed Milk Snowballs?
Sweetened condensed milk snowballs are small, round cookies made with sweetened condensed milk, butter, and either shredded coconut or flour, depending on the recipe. These cookies can be made in two popular forms: baked or no-bake. The key ingredient—sweetened condensed milk—acts as both a sweetener and binder, resulting in a soft, melt-in-your-mouth texture.
The best part? These cookies come together quickly and easily, making them perfect for busy holiday seasons. They have a nostalgic quality, reminiscent of childhood treats, and are often dusted with powdered sugar or rolled in shredded coconut for that classic snowball look.
You can try a delicious no-bake coconut snowball recipe from Foody Healthy Life.
Ingredients – What You’ll Need & Why
To make perfect sweetened condensed milk snowballs, you’ll need just a few basic ingredients, most of which you probably already have in your pantry. Here’s a breakdown:
- Sweetened Condensed Milk: This is the star of the recipe, providing sweetness, moisture, and a smooth texture that holds the dough together. It replaces sugar and milk in the traditional cookie dough.
- Butter or Coconut Oil: Adds richness and softness to the dough. Butter provides a classic flavor, while coconut oil offers a dairy-free alternative.
- Flour: Common in baked versions, flour helps provide structure to the snowball cookies.
- Shredded Coconut: Used in both baked and no-bake versions, shredded coconut gives the cookies a chewy texture and a tropical flavor. If you’re making the no-bake version, desiccated coconut works better for binding.
- Powdered Sugar: For coating the cookies after baking or chilling, this creates the snowball effect.
- Vanilla Extract: Adds depth to the flavor and complements the sweetness of the condensed milk.
You can find all of these ingredients at your local grocery store, and many are also available online.

Step-By-Step Recipe (Baked Version)
If you’re a fan of baked cookies, here’s a simple step-by-step guide to making sweetened condensed milk snowballs:
- Preheat Oven: Start by preheating your oven to 320°F (160°C). Line a baking sheet with parchment paper.
- Mix Wet Ingredients: In a large bowl, cream together sweetened condensed milk, butter, and vanilla extract until smooth.
- Add Dry Ingredients: Gradually add flour and a pinch of salt to the wet ingredients, mixing until a dough forms. You can also add shredded coconut at this point for extra texture.
- Shape the Dough: Use a cookie scoop or your hands to form small dough balls. Place them on the prepared baking sheet, spacing them about 2 inches apart.
- Bake: Bake for 10-12 minutes, or until the edges are golden brown. Keep an eye on them to avoid overbaking, as these cookies can dry out quickly.
- Cool and Coat: Let the cookies cool for about 5 minutes, then roll them in powdered sugar or shredded coconut while they are still warm for the best coating.
For a more detailed baked version, visit Lord Byron’s Kitchen.
Step-By-Step Recipe (No-Bake Version)
The no-bake version of sweetened condensed milk snowballs is even easier and requires less time. Here’s how:
- Mix Ingredients: In a large bowl, combine sweetened condensed milk with shredded coconut, and stir in vanilla extract and a pinch of salt.
- Shape the Dough: Once the mixture is well combined, roll it into small balls.
- Chill: Place the balls on a parchment-lined tray and chill in the fridge for at least 30 minutes to firm up.
- Coat: Once chilled, roll the snowballs in powdered sugar or additional shredded coconut to achieve that snowball look.
The no-bake version is perfect if you’re in a hurry or prefer not to turn on the oven.
Tips for Perfect Texture & Appearance
Achieving the ideal texture and appearance for sweetened condensed milk snowballs is all about balance—getting the right consistency in the dough and the perfect coating. Here are some tips to ensure your cookies turn out just right:
- Chill the Dough: If you’re making the baked version, refrigerate the dough for at least 30 minutes. This prevents the cookies from spreading too much during baking and ensures they hold their shape.
- Don’t Overmix: When combining the wet and dry ingredients, mix just until everything is incorporated. Overmixing can lead to denser cookies with less delicate texture.
- Coat While Warm: Roll your cookies in powdered sugar or shredded coconut while they are still warm. This helps the coating stick better, giving you that signature “snowball” appearance.
- Texture Control: If the dough is too sticky, add a little more flour or coconut. If it’s too dry, adjust with more sweetened condensed milk to get the right consistency for rolling into balls.
- Don’t Overbake: Keep an eye on the cookies while they’re in the oven. Overbaking can make them dry. Aim for golden brown edges but a soft center.
These simple tips will ensure that your snowballs have that melt-in-your-mouth, soft yet slightly chewy texture, perfect for any occasion!
Variations & Substitutions
One of the best things about sweetened condensed milk snowballs is how versatile they are. You can easily customize them to suit different tastes, dietary needs, or just experiment with new flavors. Here are some fun variations and substitutions you can try:
Flavor Variations
- Chocolate Lovers: Add mini chocolate chips or cocoa powder to the dough for a richer flavor. You can also dip the cookies in melted chocolate after baking for a decadent twist.
- Nuts: Chopped walnuts, pecans, or almonds can be added to the dough for crunch. They pair beautifully with the sweetness of the sweetened condensed milk and add texture to each bite.
- Extracts: Experiment with different extracts like almond extract or coconut extract to enhance the flavor profile. A teaspoon of orange zest or lemon zest can also add a refreshing citrus twist.
Dietary Substitutions
- Vegan: To make these cookies vegan, substitute the butter with coconut oil or a vegan butter alternative. You’ll also need to find a dairy-free sweetened condensed milk.
- Gluten-Free: Replace regular flour with a gluten-free flour blend. This keeps the texture light while catering to gluten-sensitive diets.
- Sugar-Free: Use sugar substitutes like stevia or erythritol for a sugar-free version of these cookies. Be sure to adjust the texture with a bit more liquid if needed.
No-Coconut Version
If you’re not a fan of coconut, you can skip the shredded coconut in the dough and roll the cookies in powdered sugar for a simpler look. You could also replace coconut with finely ground almonds or graham crackers for a different texture.
With all these variations and substitutions, the possibilities for your snowballs are endless!
For a gluten-free version, you can swap regular flour for a 1:1 gluten-free flour blend.
Make-Ahead, Freezing & Storing
- Make-Ahead: Prepare the dough and refrigerate it for up to 48 hours before baking. This ensures the dough remains firm and easy to shape.
- Freezing: You can freeze both the dough (pre-roll into balls) and the baked cookies. For dough, freeze the cookie balls on a baking sheet, then transfer to a freezer-safe bag or container. For baked cookies, allow them to cool completely before freezing.
- Storing: Store cookies in an airtight container at room temperature for up to 5 days, or in the fridge for longer shelf life. Baked cookies can also be stored in the freezer for up to 3 months.
Common Problems & Troubleshooting
- Cookies Spread Too Much: Make sure your dough is chilled. Warm dough tends to spread during baking.
- Too Dry or Crumbly: This may happen if you add too much flour or coconut. Add a little more sweetened condensed milk to fix this.
- Coating Doesn’t Stick: Roll the cookies in powdered sugar or coconut while they are still warm for the best results.
FAQ
- Can I use evaporated milk instead of sweetened condensed milk?
No, evaporated milk is not sweetened and will change the texture. Stick to sweetened condensed milk for the right consistency and sweetness. - How long do sweetened condensed milk snowballs last?
They can last up to 5 days at room temperature in an airtight container or longer if stored in the fridge. - Can I freeze sweetened condensed milk snowballs?
Yes! Both the dough and baked cookies can be frozen for up to 3 months.
Conclusion
Sweetened condensed milk snowballs are a perfect treat for the holidays or any time you need an easy, flavorful dessert. Whether you bake them or make them no-bake, these cookies are sure to become a family favorite. Experiment with different variations and enjoy the melt-in-your-mouth texture and festive appearance that make these cookies so irresistible!