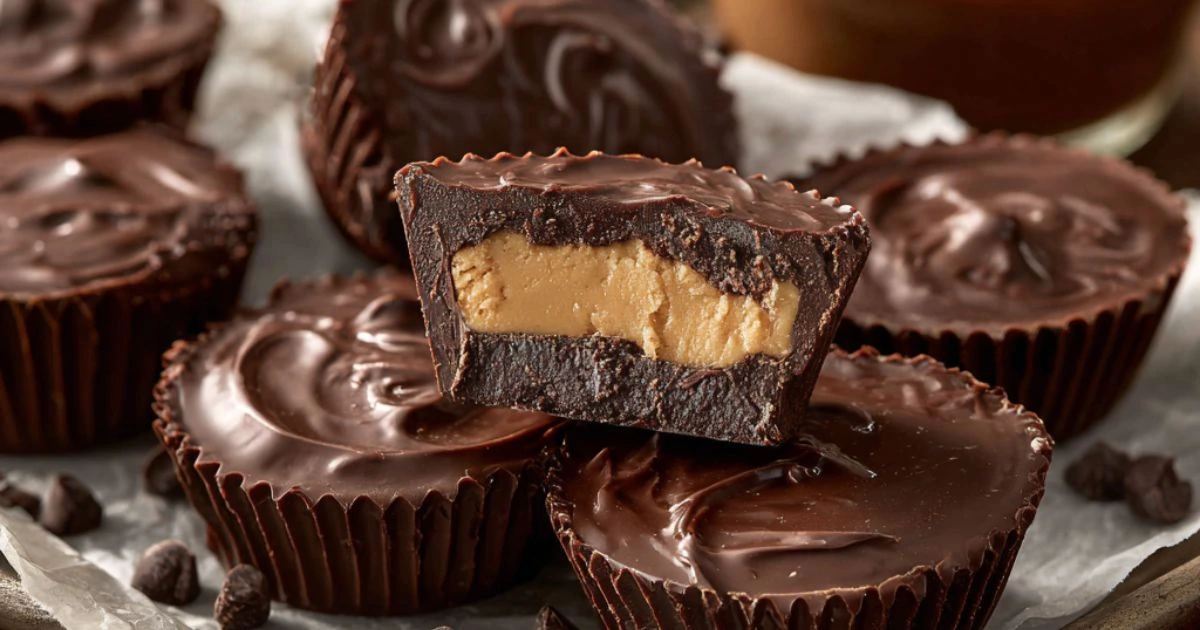
Homemade Reese’s Cups
Craving something sweet, salty, and irresistibly creamy? If you love the iconic combination of chocolate and peanut butter, then learning how to make homemade Reese’s cups might just become your favorite kitchen hack.
In this article, you’ll discover an easy, customizable recipe for making DIY peanut butter cups that rival (or beat!) the store-bought versions. Whether you’re after a healthier alternative, want to avoid preservatives, or just enjoy making candy at home, these homemade treats are the perfect solution.
Let’s dive into how you can craft your own peanut butter chocolate cups—plus explore flavor variations, troubleshooting tips, and how to store them for long-lasting enjoyment.
What Are Reese’s Peanut Butter Cups?
Originally launched in the 1920s, Reese’s Peanut Butter Cups have become a staple in candy aisles. Their trademark blend of creamy peanut butter and sweet milk chocolate is instantly recognizable. You can read more about the history of Reese’s here.
But while the store-bought version is delicious, it often contains artificial additives and unnecessary sugars. That’s why many people prefer a homemade peanut butter cup recipe for a purer, more customizable treat.
Why Make Homemade Reese’s Cups?
Making your own peanut butter cups offers several benefits:
- Ingredient control – Choose organic peanut butter, sugar-free chocolate, or vegan alternatives
- Custom flavors – Add sea salt, coconut, or even espresso powder for unique twists
- Freshness – Homemade cups have no preservatives and taste better right out of the fridge
- Fun & creative – Perfect for holidays, gifting, or kids’ kitchen projects
For a classic version, check out RecipeTin Eats’ homemade Reese’s cups, which inspired much of this guide.
Ingredients You’ll Need
To make perfect homemade peanut butter chocolate cups, here’s what you’ll need:
Core Ingredients:
- 1 cup creamy peanut butter (or almond/cashew butter)
- 2 tbsp unsalted butter (or coconut oil for vegan version)
- ¾ cup powdered sugar (or sugar-free substitute like erythritol)
- ½ tsp vanilla extract (optional)
- Pinch of salt
- 2 cups chocolate chips (milk, dark, or sugar-free)
- 1 tbsp coconut oil (for smoother chocolate melt)
Equipment:
- Silicone candy molds or muffin liners
- Microwave-safe bowl or double boiler
- Spatula or spoon
- Freezer or refrigerator
Step-by-Step Recipe for Homemade Reese’s Cups
Follow these simple steps for perfect results:
1. Prep Your Molds
- Line a muffin tin with paper liners or use silicone candy molds.
- Lightly spray with non-stick spray if needed.
2. Melt the Chocolate
- In a microwave-safe bowl, combine 1 cup of chocolate chips and ½ tbsp coconut oil.
- Microwave in 20–30 second intervals, stirring in between, until fully melted.
3. Create the Chocolate Shells
- Spoon ~1 tsp of melted chocolate into each mold.
- Use a spoon or brush to spread chocolate up the sides.
- Chill for 10 minutes to harden the base.
4. Make the Peanut Butter Filling
- In another bowl, combine peanut butter, butter, powdered sugar, vanilla, and salt.
- Mix until smooth but firm enough to scoop.
5. Add the Filling
- Roll ~1 tsp of filling into a ball and flatten slightly.
- Place it over the hardened chocolate base, leaving space around the edges.
6. Top With Chocolate
- Melt the remaining chocolate and coconut oil.
- Spoon over each cup, ensuring the filling is completely covered.
- Tap the tray gently to smooth the tops.
7. Chill and Serve
- Refrigerate for 30–60 minutes or freeze for 20 minutes until set.
- Pop them out and enjoy!
Storage Tips
Homemade Reese’s cups store well in both the refrigerator and freezer:
- Fridge: Store in an airtight container for up to 7–10 days.
- Freezer: Lasts up to 2–3 months. Place parchment paper between layers.
- Serve slightly chilled or at room temperature for the best texture.
Flavor Variations and Fun Add-Ins
One of the best things about making homemade Reese’s cups is how easy they are to customize. You can mix and match ingredients to suit your taste, dietary needs, or just to try something new. Here are some fun and flavorful twists:
Chocolate Variations
- Dark chocolate for a richer, more intense flavor
- White chocolate for a sweeter, creamier contrast
- Swirl two chocolates for a marbled look
- Use flavored chocolate (mint, orange, chili) for a gourmet feel
Nut & Seed Butter Options
- Almond butter for a subtle, nutty profile
- Cashew butter for an ultra-creamy texture
- Sunflower seed butter for a nut-free alternative
- Hazelnut butter for a Nutella-like vibe
Add-Ins & Toppings
- Crushed pretzels or graham crackers for crunch
- Mini marshmallows or caramel bits for fun textures
- Sea salt flakes or cacao nibs on top for added depth
- Dried fruit or shredded coconut for natural sweetness
Shape & Size Variations
- Use mini molds for bite-sized peanut butter cups
- Heart-shaped molds for holidays or gifts
- Layer with jam, cookie dough, or espresso for a surprise inside
The sky’s the limit when it comes to personalizing your DIY chocolate peanut butter cups!
Troubleshooting Common Issues
Making homemade Reese’s cups is simple, but a few hiccups can happen—especially the first time. Here are common problems and how to fix them:
Chocolate is too thick or clumpy
- Melt in short bursts and add coconut oil to thin it out.
- Avoid overheating, which can cause seizing.
Filling is too soft or runny
- Add more powdered sugar to thicken the peanut butter mix.
- Chill the filling for 10–15 minutes before assembling.
Chocolate separates or has white streaks
- This is usually due to “chocolate bloom,” caused by temperature changes.
- Use tempered chocolate if you want a smooth, glossy finish.
- Store in a cool, dry place to avoid bloom.
Filling leaks out of the sides
- Ensure the bottom chocolate layer is fully set before adding the filling.
- Don’t overfill—leave room for the top layer to seal the cup.
Cups stick to liners or molds
- Use silicone molds for easy release.
- Lightly grease paper liners or freeze cups before removing.
By understanding these quick fixes, your peanut butter chocolate cups will look as good as they taste—every time.
Copycat vs Gourmet: Which Version Is Best?
There are two main styles of homemade Reese’s cups: copycat and gourmet. Both are delicious, but they cater to different preferences.
Copycat Recipes
These aim to replicate the exact flavor of store-bought Reese’s. They use:
- Sweetened peanut butter
- Milk chocolate chips
- Simple mixing and melting—no advanced techniques
A great example is the Food.com copycat Reese’s recipe, which delivers that familiar taste with just a few ingredients.
Gourmet Recipes
Gourmet versions elevate the classic with:
- High-quality dark chocolate
- Natural peanut or almond butter
- Techniques like tempering chocolate for a glossy finish
They’re often less sweet, more textured, and beautifully crafted—perfect for gifting or special occasions.
Whether you prefer nostalgic flavor or artisanal flair, both styles offer a satisfying way to enjoy homemade peanut butter cups.
Are Homemade Peanut Butter Cups Healthier?
While homemade Reese’s cups are a treat, they can be made healthier with smart ingredient swaps. A typical cup contains about 120–180 calories, depending on size and ingredients.
Healthier Options:
- Use natural peanut butter with no added sugar
- Swap powdered sugar for erythritol or monk fruit sweetener
- Choose dark chocolate (70% or higher) for antioxidants
- Replace butter with coconut oil for a dairy-free version
These swaps reduce processed sugar and unhealthy fats, making your peanut butter chocolate cups more diet-friendly. You can also make keto, vegan, or low-sugar versions with minimal changes.
Frequently Asked Questions (FAQs)
Got questions about making homemade Reese’s cups? Here are the answers to the most common ones:
How long do homemade peanut butter cups last?
They keep in the fridge for 7–10 days in an airtight container. For long-term storage, freeze them for up to 3 months.
Can I use crunchy peanut butter?
Absolutely! Crunchy peanut butter adds extra texture. Just make sure it’s not too oily, or it may affect the filling consistency.
Why is my peanut butter filling too soft?
Your filling may need more powdered sugar to thicken. You can also chill it before assembling.
Can I make them without powdered sugar?
Yes. Use a binding alternative like almond flour, coconut flour, or a sugar-free sweetener such as monk fruit.
Do I need to temper the chocolate?
Not required, but tempered chocolate gives a shiny, professional finish. Great for gifting or gourmet versions.
Are these better than store-bought Reese’s?
Most say yes! You control the sweetness, ingredients, and texture, making them healthier and more flavorful.
Can I use other nut butters?
Definitely. Try almond, cashew, or sunflower seed butter for allergy-friendly or unique flavor options.
Final Thoughts: Time to Make Your Own!
Now that you know how to make homemade Reese’s cups that are healthier, tastier, and fully customizable, it’s time to head into the kitchen.
Whether you’re going for classic peanut butter cups or gourmet dark chocolate almond butter hearts, the possibilities are endless—and way more delicious than anything you’ll find in a wrapper.
Pro Tip: Make a big batch and store them in the freezer. Trust us, future-you will thank you.